

Friday, May 11
American Idol
So proud of Hollie. Looking forward to her big welcome home back to McKinney. She has inspired so many young people in our city, proud to welcome her home very soon.


Thursday, May 10
Another Throw Pillow
Made another throw pillow for the guestroom/sewing room bed. After this I think I am kinda done...lol. I've had this in my head for a while and finally had some time to make it.
This is made from a block in the quilt panel of the Brittish SEW fabric by the Henley Studio and Makower. I got it at the Quilt Asylum back in the fall last year. It coordinates with the fabric I used for Micaela's sewing machine cover. I wish I could find more of this fabric and store it forever because I think it's so cute.
 The red polka dot fabric on the pillow is the same one I used on my sewing machine cover. I used the same format as the M pillow next to it (I now realize I should not have them next to each other). You can see the tape measure pillow on the left is made with some of the same fabric from the sewing machine cover too. The black & white ginham pillows are actually made from dish towels I found in the dollar bin ($2.50 set) at JoAnn, I just sewed two towels together and I was done. I've got to run, hope you have a great Thursday.
This is made from a block in the quilt panel of the Brittish SEW fabric by the Henley Studio and Makower. I got it at the Quilt Asylum back in the fall last year. It coordinates with the fabric I used for Micaela's sewing machine cover. I wish I could find more of this fabric and store it forever because I think it's so cute.

Tuesday, May 8
Mousepad & Tissue Holder
Made this mousepad and pocket tissue holder for my boss Julie's 50th birthday. The mousepad is reversible and has the same fabric as tissue holder on the backside.

I followed this tutorial at More Misadventures to make the mousepad but added the embroidered name and a layer fusible fleece to give the pad some body. The leaf fabric is designed by Amy Schimler for Robert Kaufman Fabrics and its from the Animal Party Too collection. I love it.
Here is the backside of the mouse pad. This fabric is called Save Energy and is by Michael Miller, I went bananas when I just stumbled upon it while searching for something else online. This fabric totally represents what we do so I thought it was beyond perfect.

Here is a closeup of the tissue holder. I followed this tutorial at Skip to my Lou for it and it was super easy. You can't tell in this picture but the inside of the holder is lined in a coordinating plaid fabric. I wish I had thought of top stitching the edge of the tissue holder to match the mousepad but since I made the tissue holder first, it's too late now.

Hope you are having a great Tuesday, thanks for stopping by!
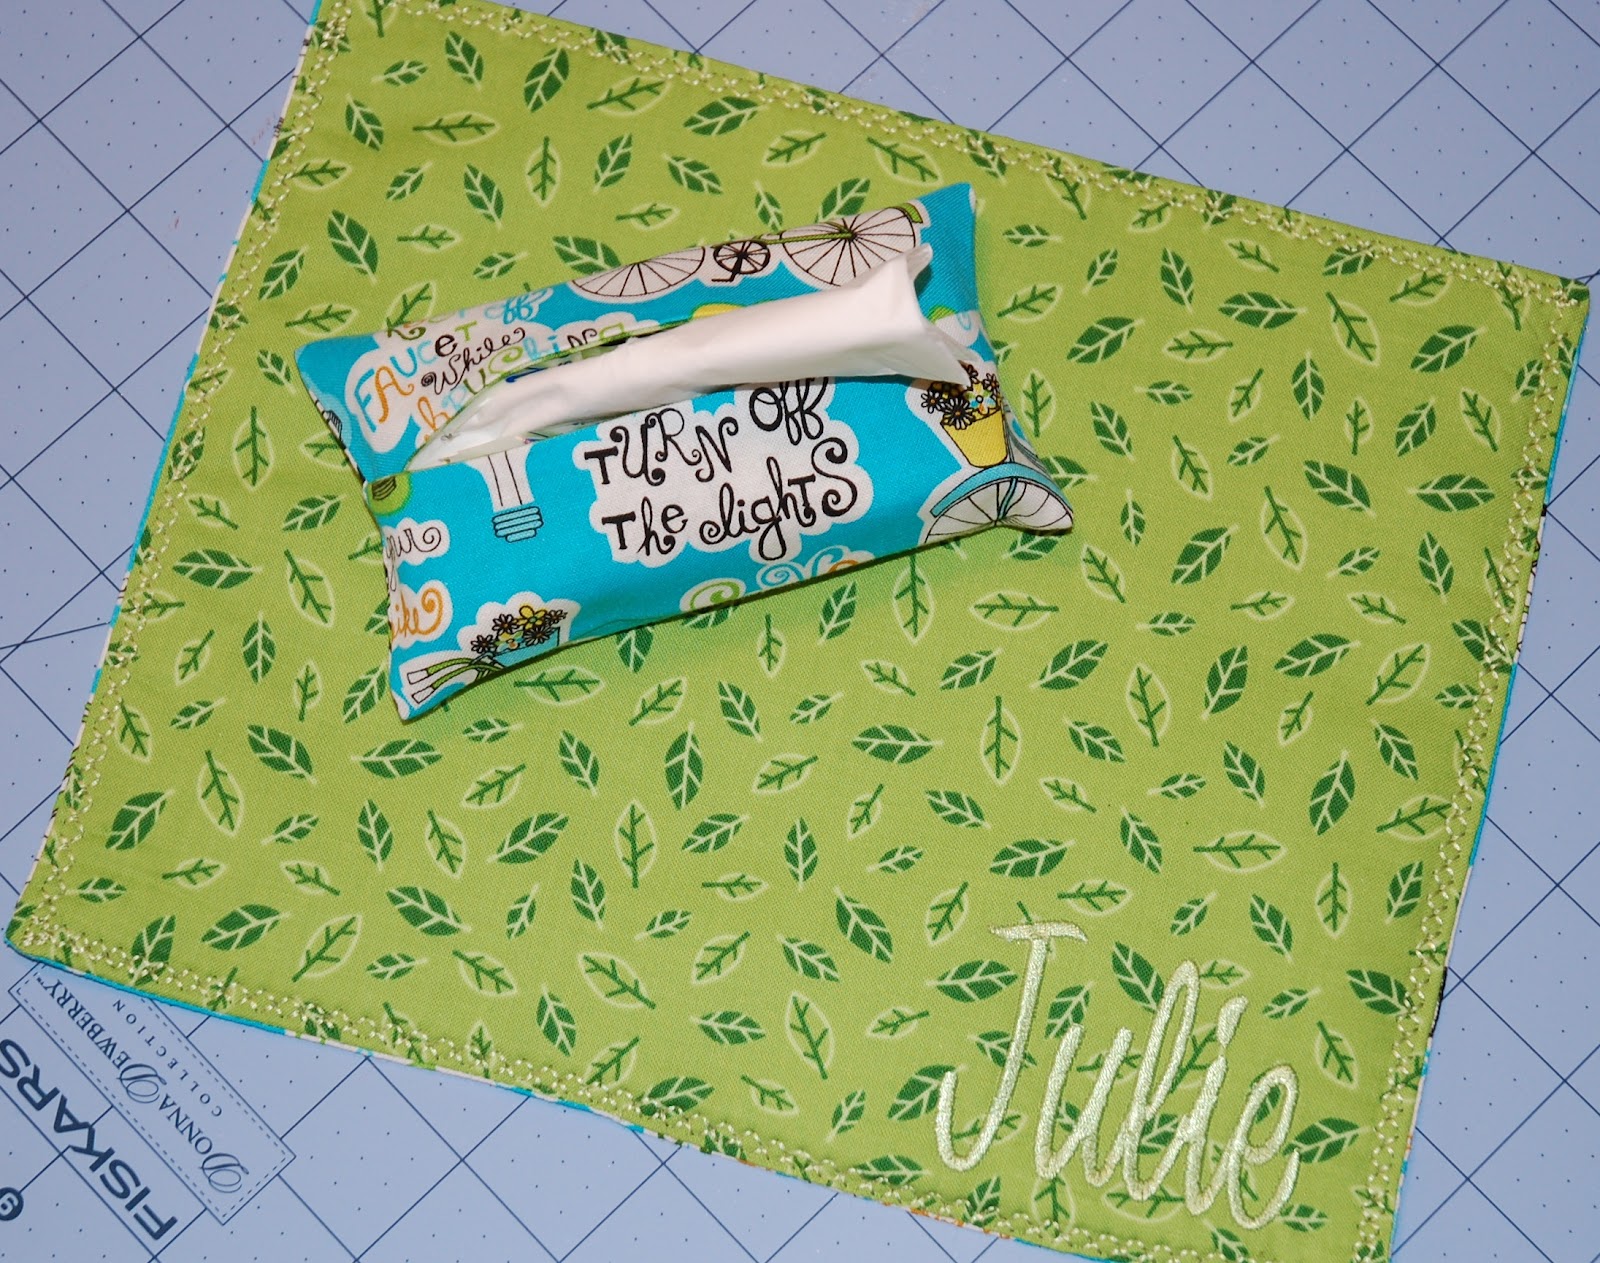
I followed this tutorial at More Misadventures to make the mousepad but added the embroidered name and a layer fusible fleece to give the pad some body. The leaf fabric is designed by Amy Schimler for Robert Kaufman Fabrics and its from the Animal Party Too collection. I love it.
Here is the backside of the mouse pad. This fabric is called Save Energy and is by Michael Miller, I went bananas when I just stumbled upon it while searching for something else online. This fabric totally represents what we do so I thought it was beyond perfect.

Here is a closeup of the tissue holder. I followed this tutorial at Skip to my Lou for it and it was super easy. You can't tell in this picture but the inside of the holder is lined in a coordinating plaid fabric. I wish I had thought of top stitching the edge of the tissue holder to match the mousepad but since I made the tissue holder first, it's too late now.

Hope you are having a great Tuesday, thanks for stopping by!
Monday, May 7
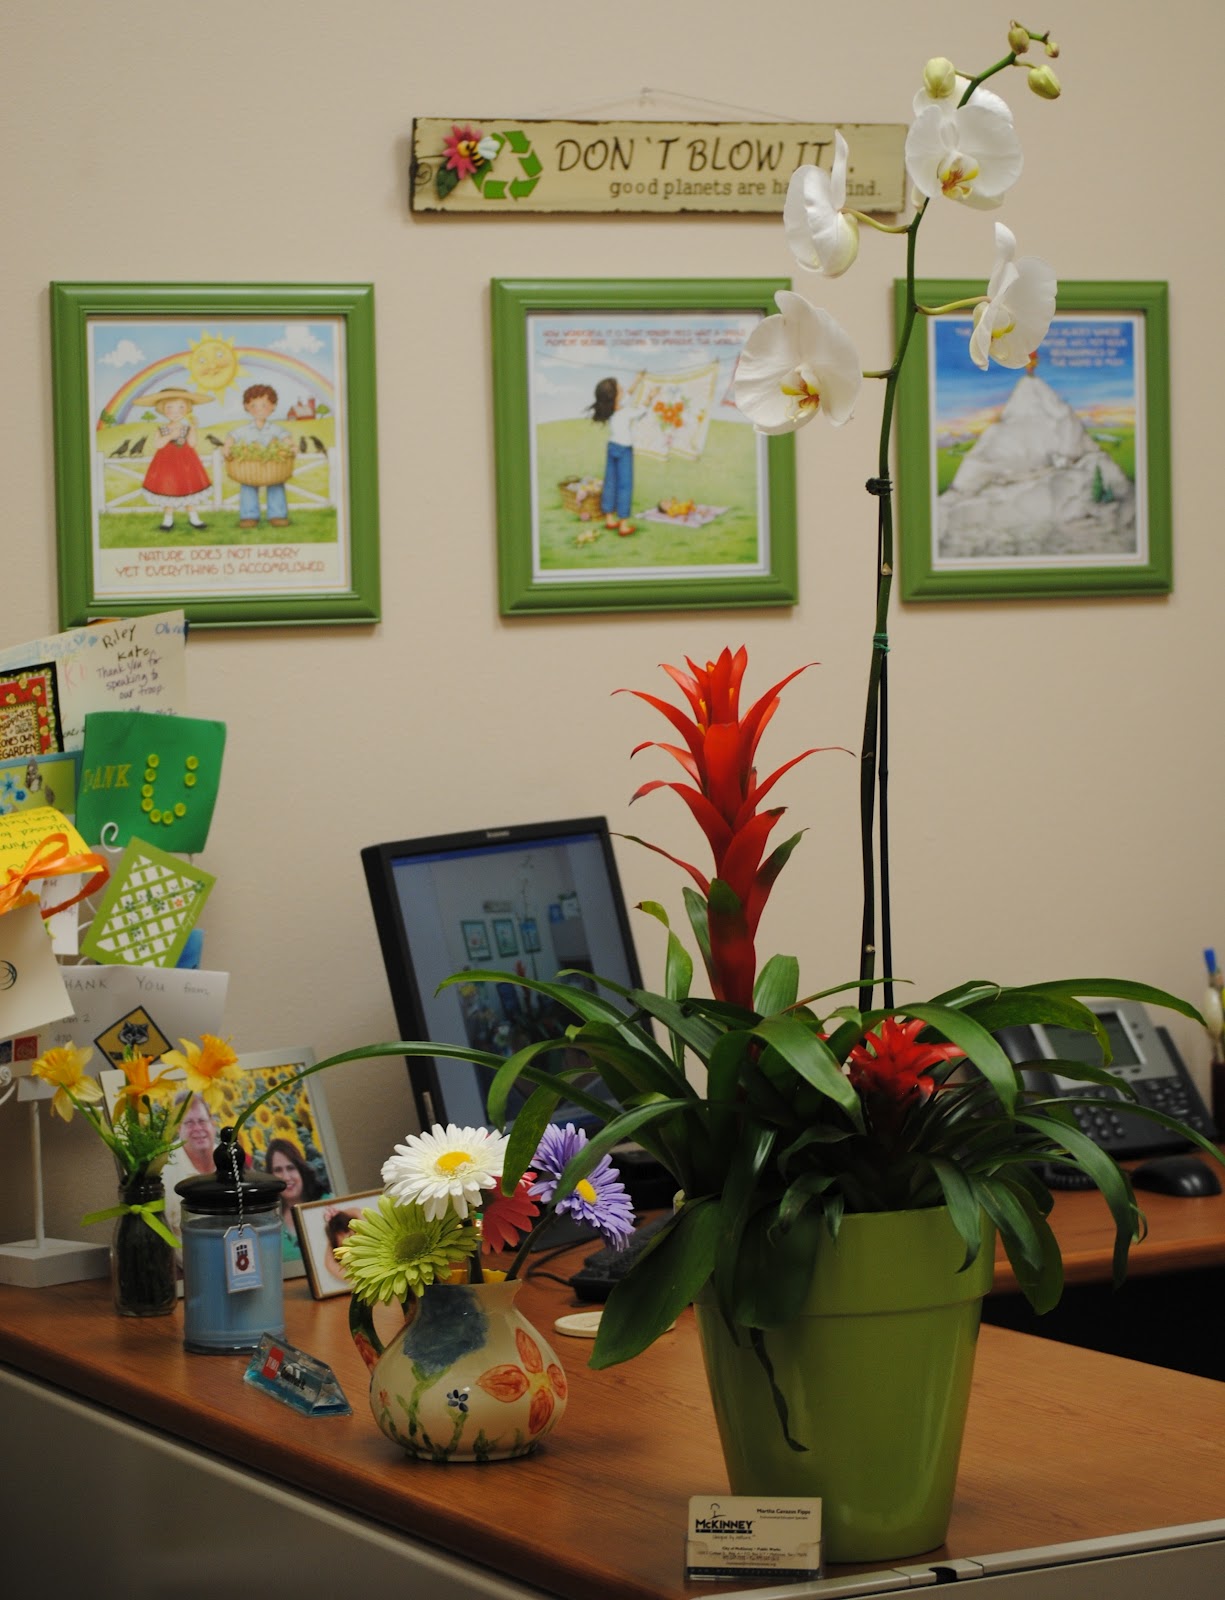
Received this gorgeous orchid & plant after speaking to the MISD PTA Council today during lunch. It looks so nice sitting on my desk! This totally makes my day! Always a pleasure speaking to a great group of residents that want to know about our programs!
 BTW-- That is Mary Engelbreit artwork in the background. I know it's not the usual decor for a government office-- All of the quotes & art portrayed are environment related. Hope you are having a great Monday!
Micaela's Pin Cushion
Micaela loves to sew. Her latest project is pin cushions, also known as bean bags to her. She shops for fabric in my stash and comes up with her own combinations. Lately she is making different pin cushions for different seasons/holidays-- (umm, I wonder where she get's such crazy ideas?).

Here she is with her latest creation, a pin cushion made with Hello Kitty fabric. The sewing part is less than 12 inches but she is so proud. She carefully turns it right side out, makes sure the corners are pointy and fills them with walnut litter, then has me close them.
 She's discovered these are perfect pillows for Barbie too. Here's Barbie resting in her birthday ball gown on one of the beds from my townhouse (circa 1978). I think Barbie is going to get a stiff neck from laying on such a hard pillow but Micaela thinks Barbie will be okay. Thanks for stopping by!

Here she is with her latest creation, a pin cushion made with Hello Kitty fabric. The sewing part is less than 12 inches but she is so proud. She carefully turns it right side out, makes sure the corners are pointy and fills them with walnut litter, then has me close them.

Saturday, May 5
Button Wreath
Good Morning!
I kept admiring all the cool button wreaths on Pinterest and decided I needed to make one.
I started with a straw wreath that I had covered in black satin ribbon for Halloween and just started adding buttons and pins. Let's just say I highly recommend a thimble. When I started the project, I thought I would be done pretty quickly. After a couple of days, I made a special trip to the store for a thimble because I could not find one at home. This took me a while. It's hard to tell in this picture but this wreath is 18 inches in diameter and is covered with buttons on the back too. I literally put this together while watching the last season of the Bachelor. (I try to do something productive while watching mindless tv shows).
 I used more than 1800 pins and almost 900 buttons. My index finger hurt from pushing all the buttons into the straw but I love how it turned out. I had a bunch of buttons already then had my Mom send me some of hers. When I got her package, Mom sent some from my great aunt and one of her friends, so there is a nice mix of old and new including some orphan buttons from my own childhood outfits that my Mom made me (I guess those could be considered kinda semi vintage).
This wreath proudly hangs in my sewing area. Slowly but surely my room is coming together.
Hope you are having a great weekend thanks for stopping by!
I kept admiring all the cool button wreaths on Pinterest and decided I needed to make one.
I started with a straw wreath that I had covered in black satin ribbon for Halloween and just started adding buttons and pins. Let's just say I highly recommend a thimble. When I started the project, I thought I would be done pretty quickly. After a couple of days, I made a special trip to the store for a thimble because I could not find one at home. This took me a while. It's hard to tell in this picture but this wreath is 18 inches in diameter and is covered with buttons on the back too. I literally put this together while watching the last season of the Bachelor. (I try to do something productive while watching mindless tv shows).

This wreath proudly hangs in my sewing area. Slowly but surely my room is coming together.
Hope you are having a great weekend thanks for stopping by!
Thursday, May 3
Lamp in Sewing Room
The room where I sew is technically our 4th bedroom which is supposed to be a guest room. Since most of our out of town family has moved here, it is rare for us to have guests. I've sorta taken over the room with my sewing stuff but I am still keeping a bed and normal guest room things in the room.
In keeping with the red and black color scheme of the sewing stuff, I decided the lampshade on the bedside table needed to be redone to coordinate with the rest of the room. This was an easy peasy project that I probably should have done a long time ago. I took a shortcut and purchased one of the self adhesive shades, added the Sew Now Sew Wow- Alexander Henry fabric and a pom pom trim to the bottom and I was done. I have used the Sew Now fabric all over the room, can you tell I love it?

The fabric hooped on the wall is more of the 'sewing machine' black & white fabric from the spray cans I covered last month. I am doing a whole group of fabric hoops on the wall but I am not quite done.
The little table the lamp sits on belonged to my grandmother so it has probably been in the family for about 100 years (my Dad is 82). Growing up, it was orange peach color, then I brought it with me to college when I got my first appartment; with me it's been several different colors.... now black. The yellow crocheted doily on the table was made by my maternal grandmother, it's one of the only things I have that belonged to her. Everytime I look at the table and doily, I am reminded of my hometown and family. Hope you are having a great day. Thanks for stopping by!
In keeping with the red and black color scheme of the sewing stuff, I decided the lampshade on the bedside table needed to be redone to coordinate with the rest of the room. This was an easy peasy project that I probably should have done a long time ago. I took a shortcut and purchased one of the self adhesive shades, added the Sew Now Sew Wow- Alexander Henry fabric and a pom pom trim to the bottom and I was done. I have used the Sew Now fabric all over the room, can you tell I love it?

The fabric hooped on the wall is more of the 'sewing machine' black & white fabric from the spray cans I covered last month. I am doing a whole group of fabric hoops on the wall but I am not quite done.
The little table the lamp sits on belonged to my grandmother so it has probably been in the family for about 100 years (my Dad is 82). Growing up, it was orange peach color, then I brought it with me to college when I got my first appartment; with me it's been several different colors.... now black. The yellow crocheted doily on the table was made by my maternal grandmother, it's one of the only things I have that belonged to her. Everytime I look at the table and doily, I am reminded of my hometown and family. Hope you are having a great day. Thanks for stopping by!
Wednesday, May 2
Fabric Banner
I made these "Sew Much Fabric" ~fabric banner letters while I was off for a few days last week. I made them to place above the racks where I store all of my fabric. They are an In the Hoop design from Pickle Pie Designs. The design calls for stringing the letters together with ribbon but instead I ommitted the ribbon and just hid a flat tac in the back layer of the letter to hang them on the wall. These are super quick and easy to make. I think it takes longer to hoop the fabric and cut around the letters than it does to sew them. I'll show the 'fabric racks' where I store all my small cuts of in the next few days.
Thanks for stopping by.

Thanks for stopping by.

Saturday, April 28
First Bloomers
I hope you are having a great Saturday. I am enjoying my time off. Today Micaela and I are headed to Shreveport for a girl trip, we are so excited.
I could not go to Shreveport empty handed. I've been wanting to embroider baby bloomers forever and finally had a 'candidate'. These are for my dear friend's grand-daughter. I still can't believe, I have a friend who is in my age range (forty-something) who has a grandchild. I remember when the daughter, now the new mom was a toddler herself...
Here are the bloomers...
 I embroidered the eyelet pair in a monogram font that I use all the time. I thought the hot pink and black would be kinda fun. I love this font, I've used it for aprons, and pillows and lots of other stuff.

I could not go to Shreveport empty handed. I've been wanting to embroider baby bloomers forever and finally had a 'candidate'. These are for my dear friend's grand-daughter. I still can't believe, I have a friend who is in my age range (forty-something) who has a grandchild. I remember when the daughter, now the new mom was a toddler herself...
Here are the bloomers...


The second pair is denim and I used a firecracker font. I thought these would be cute for Memorial Day, Flag Day and of course Fourth of July. These were so fun, I wish Micaela was still a baby so I could make her some. Thanks for stopping by!
Friday, April 27
Daffodil Bag
If you read my blog, you know I am into Daffodils. Last month I made a bag to carry all my stuff to the Texas Daffodil Show at the Dallas Arboretum. This is the bag.

I started by purchasing the daffodil design from Embroidery Boutique more than a year ago. (that's how long I have been thinking about making this bag). Then I purchased about 12 different fabrics in yellow and green. I wanted a patchwork look, my inspiration was a bag made from a jelly roll (2.5 inch strips of fabric). I pieced all the fabrics together and made up the bag as I went along. I top stitched the strips with a decorative stitch and alternated yellow and green thread. I appliqued a free hand circle I cut from a lid (honest) with the daffodil applique on it and then top stitched it to the bag. I lined the inside with one of the yellow fabrics, added a ruffle at the top, a velcro closure, and long strap so I could carry it criss cross. Ta Da.


I started by purchasing the daffodil design from Embroidery Boutique more than a year ago. (that's how long I have been thinking about making this bag). Then I purchased about 12 different fabrics in yellow and green. I wanted a patchwork look, my inspiration was a bag made from a jelly roll (2.5 inch strips of fabric). I pieced all the fabrics together and made up the bag as I went along. I top stitched the strips with a decorative stitch and alternated yellow and green thread. I appliqued a free hand circle I cut from a lid (honest) with the daffodil applique on it and then top stitched it to the bag. I lined the inside with one of the yellow fabrics, added a ruffle at the top, a velcro closure, and long strap so I could carry it criss cross. Ta Da.

Thanks for stopping by!
Thursday, April 26
Butterflies & Bees in our Backyard
Went outside to pull weeds and water this morning (I took a day off from work). Discovered the Augusta Duelberg plant was covered in bees and butterflies. I quickly ran in the house to get the camera, these are a few of my snapshots. I could have taken pictures for hours, the bees and butterflies just kept posing for me...


I am enjoying my day away from the office. Thanks for stopping by!


I am enjoying my day away from the office. Thanks for stopping by!
Wednesday, April 25
Quilted Laptop Sleeve
A couple weeks ago we purchased a new laptop. I decided it needed a 'homemade' sleeve using some fun fabric I found in the WalMart fabric department~~ of all places. I followed a great tutorail by Sew Mama Sew that I found on Pinterest.

I followed pretty much the whole thing but instead of using fusible fleece adhered to a contrasting fabric for lining, I used real fleece in a solid color. I also did some "quilting" to sew the fleece in place. (This is the same fleece I used to make the soccer blanket last year). I also added two strips of velcro for fastening to allow a fitted closure if I had a few extra things in the sleeve.

The tutorial was very good and easy to follow. I think it turned out pretty cute and I look forward to making a few more.
By the way, if you haven't discovered Pinterest, its's quite addictive. I have more than 2000 pins, everything from sewing ideas, to tablescapes, to paperscraps, feel free to follow me here. Thanks for stopping by!

I followed pretty much the whole thing but instead of using fusible fleece adhered to a contrasting fabric for lining, I used real fleece in a solid color. I also did some "quilting" to sew the fleece in place. (This is the same fleece I used to make the soccer blanket last year). I also added two strips of velcro for fastening to allow a fitted closure if I had a few extra things in the sleeve.

The tutorial was very good and easy to follow. I think it turned out pretty cute and I look forward to making a few more.
By the way, if you haven't discovered Pinterest, its's quite addictive. I have more than 2000 pins, everything from sewing ideas, to tablescapes, to paperscraps, feel free to follow me here. Thanks for stopping by!
Monday, April 23
Micaela's Sewing Space
This is Micaela's little corner of 'our' sewing room. We got her the mini cube shelf (Mini Cubeicals by Closetmaid from Target) for her birthday because she wanted a shelf like mine for her stuff. She even helped assemble it yesterday. We had the little table but now her space is more like mine. She loves it! Notice the fabric in the top left cubby is her assortment of weenie dog fabric, we'll be making a cover for her sewing machine and some cute stuff for her room with them very soon.
 Thanks for stopping by!

Thursday, April 19
Owl Sewing Kit
I am participating in a needle case exchange at one of my local quilt stores, The Quilt Asylum during the month of June. I've been looking for patterns and found a really fun owl "sewing kit" one (in the hoop) at Embroidery Garden. I had a super busy week and spent most of Sunday resting, cleaning and catching up...I took a break to sew and decided to make one to test the pattern.
Here it is, I think it turned out pretty cute.

When you undo the turquois knotted loop (hair elastic) around the buttons, inside the quilted wings you put your pins and needles, in the belly pocket seam ripper and little scissors and there are two spools of thread for the feet at the bottom. The whole thing is a pin cushion too and it's weighted with walnut litter which will sharpen your needles and pins as you (stab) it. I really like it and plan to make more. I really struggled with the fabric choice because I don't have many small patterns that all coordinate (new excuse for buying more fabric). This pattern was worth every penny! Thanks for stopping by!
Here it is, I think it turned out pretty cute.

When you undo the turquois knotted loop (hair elastic) around the buttons, inside the quilted wings you put your pins and needles, in the belly pocket seam ripper and little scissors and there are two spools of thread for the feet at the bottom. The whole thing is a pin cushion too and it's weighted with walnut litter which will sharpen your needles and pins as you (stab) it. I really like it and plan to make more. I really struggled with the fabric choice because I don't have many small patterns that all coordinate (new excuse for buying more fabric). This pattern was worth every penny! Thanks for stopping by!
Tuesday, April 10
Painting Oreo's House

My husband built a dog house for our new dog Oreo back in December. He left the wood unpainted because he knew Micaela would have some 'input' on the color etc. Well, three months have flown by and the house was still plain wood. Everytime Micaela and I would go outside she would say, "Mommy, we need to paint Oreo's house".
Well the day finally came, we had a free day when it was dry and clear outside. We struggled but we managed to lift the doghouse onto the red wagon draped with a drop cloth.  We painted and painted. We did a couple of base coats in a simple glossy beige paint and then moved onto painting flowers as Micaela wanted. She drew and I painted. We had fun. The wind helped us by drying the paint quickly but made it a challenge to keep the small acrylic paint containers upright. Oreo helped by knocking over the paint containers that the wind didn't move and running off with paint brushes...it was comical.
We painted and painted. We did a couple of base coats in a simple glossy beige paint and then moved onto painting flowers as Micaela wanted. She drew and I painted. We had fun. The wind helped us by drying the paint quickly but made it a challenge to keep the small acrylic paint containers upright. Oreo helped by knocking over the paint containers that the wind didn't move and running off with paint brushes...it was comical.After several hours, we finished. Here it is... (this is right before we added the wood name letters)

Oreo didn't know what to think at first, he barely wanted to get close it it.

After much encouragement and a few treats he crawled inside. We think he loves his newly 'redecorated"' house.

Micaela is happy too! 
Thanks for stopping by!
Monday, April 9
Easter 2012
Here's Micaela on Easter Sunday... can't believe she will be seven in just a few weeks. Our roses have a gazillion blooms!
Wednesday, April 4
Tornados in the area
April 3rd-- yesterday was an eventful day, lots of tornados in the area. Long story short, the tornados did not hit our area but I did get the opportunity to spend more than an hour in the storm shelter (aka music room) at the school with 120+ of Micaela's classmates. The kids did great and I was impressed about how well the staff had complete control over the kids.
I had just purchased a new umbrella and rainboots over the weekend. The umbrella came in handy for Micaela and her friend Caroline as we exited the school. They thought the whole tornado episode was alot of fun. God willing we will not have to go through that anytime soon.
Here are the girls as we left the school, they look like they just came out of a party with big smiles on their faces...
I had just purchased a new umbrella and rainboots over the weekend. The umbrella came in handy for Micaela and her friend Caroline as we exited the school. They thought the whole tornado episode was alot of fun. God willing we will not have to go through that anytime soon.
Here are the girls as we left the school, they look like they just came out of a party with big smiles on their faces...

Saturday, March 31
Easter is coming

Easter is around the corner. This is a basket got for Micaela last year. I embroidered the liner and added ribbons for ties to dress it up a bit.
Monday, March 26
Covers for cans

I use spray adhesive and starch pretty regularly in my sewing room and my cans are always out. The other day I had a crazy idea to cover them. At first I was going to modpodge them but then realized I would have to do that every time I got a new can. So instead I decided to make covers that I could remove easily.
.
.
.
.
.
.
This is what I came up with.
 These are quilted and fasten with velcro in the back. I really like the tiny pompom fringe on the edge. The black & white sewing machine fabric is Brittish from Makower UK - The Henley Studio . The frame with text is appliqued on. Now they have little outfits and match my room perfectly-- crazy I know! Thanks for stopping by!
Monday, March 19
Texas Wildflowers
Micaela spent the week of Spring Break with my parents in South Texas. This weekend we drove "half way" to pick her up. The traffic traveling across central Texas (from San Antonio to Dallas) was tremendous so, we detoured north up some rural hwys for several hours to avoid stop and go traffic on the interstate. In the end, we didn't save any time but it was one of the most enjoyable drives we've ever had home. The wildflowers and bluebonnets painted incredible scenes for us, a couple of times we pulled over to take a few snapshots of Micaela. This snapshot was one of my favorite.

That's not her usual travel attire, we had that red dress in the suitcase by chance because she went to a fancy party with my parents. Hope you had a great spring break, thanks for stopping by!
That's not her usual travel attire, we had that red dress in the suitcase by chance because she went to a fancy party with my parents. Hope you had a great spring break, thanks for stopping by!
Saturday, March 17
Cover for Janome 300e!
I finally made a cover for my second embroidery machine, the Janome 300e and I love how it turned out.

Red scissor fabric is from Moda's Half Moon Modern collection, got it at HIQ. The Ruler fabric is from My Mind's Eye, got it at HIQ. The Black & White button fabric used on the M is Brittish from Makower UK, the Henley Studio--got it online. And the black & white striped fabric is from Butterfly Swirl by Jackie Shapiro for Windham Fabrics, got it at QA. I love my two local quilt stores Happiness is Quilting & Quilt Asylum.
I actually had another idea in mind for the M monogram but in the end ended up doing applique using my Cricut Expression and the Designer's Calendar cartridge to cut out the M out of fabric with Therm O Web. My original idea was to make the M with buttons but after sewing on about 30 buttons to the cover I did not like how the buttons weighed down the cover so I ripped-- I mean gently removed them and started over with an appliqued M which I then satin stitched with my DC5100.
Wednesday, March 14
Word Napkins
My sister in law asked me to embroider some napkins with a list of her favorite words. I think they turned out pretty cute. 
Thanks for stopping by!
Tuesday, March 13
Towel Wrap
Micaela gets invited to a couple of birthday parties a month and I always looking new ideas for gifts. Since I am beginning my third year of embroidering just about every gift we give, quite a few of her friends have received the "standard" beach towel and blanket. The other day I stumbled across a tutorial for making bath wraps... bingo-- our 2012 girl gift! I thought this would be handy at home and for the pool during the summer.
So here it is! A towel wrap! I suspect I will be doing a bunch of these this year. The first one was her friend Carly. I added a heart peace sign to make it a little more girly since all the girls are heavy into peace signs & hearts these days. She loved it! 
Thanks for stopping by!
Sunday, March 11
Dallas Arboretum
We visited the Dallas Arboretum during Dallas Blooms this weekend and it was lovely. Here are a couple of my favorite photos taken by my husband.


Saturday, March 10
Texas Daffodil Show
If you follow my blog you know I have developed a new facination with daffodils. Well, this weekend was the Texas Daffodil Show at the Dallas Arboretum. This was my first "show" as an "exhibitor" and it was great fun. Three flowers from our garden here at home placed and so did another friends. Here are pictures of our flowers with our ribbons.
This photo below received honorable mention in the Photography Contest- Special Effects category. This effect is called HDR-ish and I did it using Picnik.com.

Here is the original photo from above.

One of Micaela's Special Effects photos received a blue ribbon and was a judge favorite as "Great Abstract".

The Texas Daffodil Show was alot of fun and I hope to do it again next year!
Subscribe to:
Posts (Atom)