Micaela's bedroom and playroom are extra tidy for the first time in months, worth taking a picture since it does not happen very often!
The playroom is pink and periwinkle blue with a glossy white chair rail. It's hard to tell in this picture but the item on the wall is a castle and the lettering under says "The Princess Plays Here".
You can see a glipse of her bedroom in the doorway. It's extremely rare for both to be this tidy. Nothing like company coming to get the room in shape, we had family and friends over on Saturday and Sunday, we are having an end of school Playdate at the end if the week. Big question is how long it will last. Thanks for stopping by.
Tuesday, May 31
Monday, May 30
"Little Girl" Table for Memorial Day BBQ

We had a BBQ with some dear friends. Micaela decided to set a special "little girl" table. Check it out... She wrote out the placecards herself. She knows exactly where to find the right stuff, notice the flag stirers in the glasses, the little star salf & pepper, and even found a patriotic bear for the centerpiece! Love my girl!
Monday, May 9
Sewing Cabinet
Sorry I haven't posted for more than a week, time is just flying by but what's new!
As you know, I have been looking for a sewing cabinet for months. I did not like any of the new laminate stuff in the stores so I was on a mission to find something old. Last month I got lucky and just happened to check Craigs List early one morning. I found one for FREE from a nice lady in Plano, just a few minutes away!!!
The bonus with the cabinet was the sewing stool, which I painted and reuphostered a few weeks ago.
Since then, I've been busy working on the sewing cabinet! It took me longer than expected to get this baby done but after a few bruises and scrapes on my legs, some paint and sand paper-- Ta Da, it's done!
Here is the before... as you can see, quite ugly but full of potential.

And now, here it is all repainted, with new hardware and looking oh so cute in the "sewing area" of our guest room.

Happily Linking to
Metamorphisis Monday at Between Naps on the Porch
I made it without my hubby at Shanty Chic
Southern Hospitality
Monday, April 25
Another Aggie Baby

Here's another Aggie Burp Cloth & Bib Set from my Etsy Store. Sorry for the bad picture, that's the best light I could get outside-- it's so hard to photograph white items on cloudy days.

This set is going to a customer in Manvel, Texas near Houston. So far all the Aggie sets I have made have been for boys. I would love to get an order for a girl set so I could use a cute girly curlz font for the letter instead of block style. Hopefully soon, I know plenty of parents who aspire for their daughters to attend Texas A & M University (I am certainly one).
Visit my Etsy Store to order a set today! Thanks for stopping by.
Linking to Made by You Monday

This set is going to a customer in Manvel, Texas near Houston. So far all the Aggie sets I have made have been for boys. I would love to get an order for a girl set so I could use a cute girly curlz font for the letter instead of block style. Hopefully soon, I know plenty of parents who aspire for their daughters to attend Texas A & M University (I am certainly one).
Visit my Etsy Store to order a set today! Thanks for stopping by.
Linking to Made by You Monday
Sewing Stool
Posting to Metamorphis Monday at Between Naps on the Porch.
For months I have been hunting for a sewing cabinet. I didn't like any of the new ones in the stores so I was determined to find an old one with character. A few weeks ago while browsing Craigs List I came across one that was FREE. I quickly sent the seller/giver an email to find out if it was still available. Much to my surprise, it was still available, included a matching stool and the giver was in Plano less than 20 miles away. Woo Hoo!
The cabinet and matching stool are old, (they belonged to the giver's grandmother and she was old herself)- very sturdy/heavy and not exactly pretty but I always like a challenge.
So here is what the stool looked like when I brought it home...
The first thing I did was removed the cushion and start sanding...
The next day I painted it.
The day after that I upholstered the cushion with my sewing theme fabric, (Sew Now, Sew Wow by Alexander Henry) and ta da, here it is now!
A close up of the cushion.
I found some bloggers who have done very similar projects. Confessions of a Craft Addict did a massage stool, and then I found a sewing chair manufactured by Arrow (very similar to my stool covered in the fabric too), it retails for $179.99.
I feel so fortunate to have gotten this for free, thank you Mrs. Janice in Plano!
The sewing cabinet will not be as easy, I've got to take it apart, sand and paint all the different pieces, then put it back together. Look for updates soon. Thanks for stopping by!
For months I have been hunting for a sewing cabinet. I didn't like any of the new ones in the stores so I was determined to find an old one with character. A few weeks ago while browsing Craigs List I came across one that was FREE. I quickly sent the seller/giver an email to find out if it was still available. Much to my surprise, it was still available, included a matching stool and the giver was in Plano less than 20 miles away. Woo Hoo!
The cabinet and matching stool are old, (they belonged to the giver's grandmother and she was old herself)- very sturdy/heavy and not exactly pretty but I always like a challenge.
So here is what the stool looked like when I brought it home...
The first thing I did was removed the cushion and start sanding...
The next day I painted it.
The day after that I upholstered the cushion with my sewing theme fabric, (Sew Now, Sew Wow by Alexander Henry) and ta da, here it is now!
A close up of the cushion.

I found some bloggers who have done very similar projects. Confessions of a Craft Addict did a massage stool, and then I found a sewing chair manufactured by Arrow (very similar to my stool covered in the fabric too), it retails for $179.99.
I feel so fortunate to have gotten this for free, thank you Mrs. Janice in Plano!The sewing cabinet will not be as easy, I've got to take it apart, sand and paint all the different pieces, then put it back together. Look for updates soon. Thanks for stopping by!
Saturday, April 23
Earth Day Giveaway
Happy Belated Earth Day everyone! I am giving away a gardening apron and shovel set from my Embroidered Love Etsy Store in celebebration of Earth Day! I am doing this in partnership with Keriann at Blue Jeans and Pearls. Go to her blog to read all about the giveaway!
Friday, April 22
Tuesday, April 19
Flip Flop Beach Towel
Here's a birthday gift all ready to go! This is for one of Micaela's little soccer friends, the birthday party is this Friday and we're so excited.

I packaged it up in a bin instead of a gift bag....(makes for zero waste!).

I packaged it up in a bin instead of a gift bag....(makes for zero waste!).
Tuesday, April 12
Monogram Throw Pillow
Things are moving right along in my sewing/guest room with the color scheme change. I've started to make throw pillows to match the new colors. Here is the first pillow I made with a few differnt fabric scraps and ribbon I already had in my stash.
This measures about 14.5 inches stuffed, but was 19" square without stuffing. I did not follow a pattern, just made it up as I went along. First, I appliqued the M on the orange flower dot square that had fusible fleece ironed on the back. I did the M using the embroidery machine and a Hanna Montana font from 8 paws and a Claw. Then I used some temporary spray adhesive to apply it to the larger square of black polkadot fabric. To hide the edge of the orange square, I sewed on ribbon. Initially I was going to miter the corners and then figured extending the ribbon to the edge was easier. I was concerned about the ribbon moving as I pinned it on, so I held it in placed with spray adhesive and then top stiched on the very edge. I think fabric spray adhesive is one of my favorite supplies in my sewing stash. I stuffed it with filling from some pillows I have retired from service so I technically did not spend anything to make this. Woo Hoo, one pillow down and a bunch more to go! Thanks for stopping by! Linking to: Today's Creative Blog, Sew Much Ado
Tuesday, April 5
Embroidered Sewing Machine Cover
Linking to Skip to My Lou's "Made by You Mondays"
After making the embroidering machine a cover, the sewing machine got jealous so I had to make her one too. LOL, I debated about using the same fabrics and in the end decided to use different ones.

After making the embroidering machine a cover, the sewing machine got jealous so I had to make her one too. LOL, I debated about using the same fabrics and in the end decided to use different ones. 
I found this tape measure fabric designed by Cosmo Cricket and manufactured by Andover at the Happiness is Quilting store here in Downtown McKinney. Of course, I had to have it. I combined it with a red and white polka dot broadcloth that I took from my mother's stash when we visited in the fall. Mom bought the red & white dot fabric when I was a little girl and never got around to making anything with it. I was glad to use it for my cover as it will always be a reminder of my Mom who made teaching me to sew (and cook) a priority while I was growing up.
I did not have a pattern so I visited a couple of blogs to figure out how to do it. I followed this Sew 4 Home tutorial and only made a few adjustments. After I was done, I thought it was a little plain, so I decided to embroider on it. After much thought (and deliberation) I decided to embroider my motto: "Sew your stress away" because that is what I try to do every time I sew!
Thanks for stopping by!
Thursday, March 31
Dr. Suess Baby
Every once in a while I can make something, the minute I get a request or idea. Last night was one of those times. My SIL had asked me to make something Dr. Suess for a friend's baby that was scheduled to arrive any day. I had seen this Robert Kauffman Dr Suess fabric at the store a month or two ago and was inclined to buy it but with my growing fabric stash I decided to hold off. By total coincidence yesterday I stopped by the Happiness Is Quilting in Downtown McKinney to pick up some of the fabric. Then last night my SIL emailed to let me know 'Shaun Michael" had been born at 7:17 p.m. and gave me the rest of the baby stats. Well needless to say, I got right on it immediately. Who needs sleep when you've worked 10 days in a row without a day off anyway! I piddled with different designs but in the end by 11:30 p.m. this is what I had come up with. I am so pleased. I am going to be listing this in my Etsy store soon.
While the embroidery stitched out, I made the card (yes, a card) to match with a swatch of the fabric and some Heat n Bond adhesive iron on. I love making cards to coordinate with sets, it just makes everything look so complete. This card is 5.5 inches square. 
I stitched the inside of the card to add a little interest. The thread looks black but its the same shade of blue/teal from the fabric.

Wednesday, March 30
Changing Gears... I mean Color Schemes
Last month while shopping for fabric, I came across a sewing theme fabric by Alexander Henry called "Sew Now". I fell in love with it! I decided that color scheme would be perfect in my sewing area which is a portion of our guest room. So here we go changing color schemes.... So far I have made a cover for my embroidery machine and a cornice for the window in the "Sew Now" fabric. . Here's the embroidery machine cover....
My embroidery machine came with a vinyl cover so I took it apart and used it as a pattern to make one out of the fabric. To add body to the fabric, I ironed fusible fleece to the back (I love that stuff). I used a contrasting black and white polka dot for the side panels and added a black pom pom trim to the bottom. I am pleased with the results... . Now the cornice...
The cornice was interesting, I had no pattern and was eager to make it quickly. I used a thin piece of plywood, covered it with batting and then covered it with fabric. I made it large so the pattern in the fabric would show. I took a major short cut by omitting side panels and just hung the board (like a picture) above the window. Yes-- major short cut but I don't think there is a cornice police that will come get me. As far as I am concerned, it works in my book! . Thats all for now, more stuff in the coming weeks. My plan is to change out the comforter, add throw pillows and make a few fun accessories for the room. This will keep me busy for the next month or so. Thanks for stopping by...
My embroidery machine came with a vinyl cover so I took it apart and used it as a pattern to make one out of the fabric. To add body to the fabric, I ironed fusible fleece to the back (I love that stuff). I used a contrasting black and white polka dot for the side panels and added a black pom pom trim to the bottom. I am pleased with the results... . Now the cornice...
The cornice was interesting, I had no pattern and was eager to make it quickly. I used a thin piece of plywood, covered it with batting and then covered it with fabric. I made it large so the pattern in the fabric would show. I took a major short cut by omitting side panels and just hung the board (like a picture) above the window. Yes-- major short cut but I don't think there is a cornice police that will come get me. As far as I am concerned, it works in my book! . Thats all for now, more stuff in the coming weeks. My plan is to change out the comforter, add throw pillows and make a few fun accessories for the room. This will keep me busy for the next month or so. Thanks for stopping by...
Friday, March 25
Earth Hour
Thursday, March 24
Spring Gardening
I hope you are having a daffodil kind of day!
These are some of the 100+ daffodil bulbs Micaela and I planted in one of our backyard flower beds. We planted these late, nearly the end of January right before the February (super bowl) snow we got in North Texas.
This is our second year to plant daffodils, last year's batch in the front yard already bloomed (and I forgot to take pictures). I did not want to miss the picture opportunity for these!
I love this little dog "statue", he's been digging in my flower beds forever. We haven't seen his head in more than 7 years-- there must be a bone buried in there somewhere! Thanks for stopping by!
Wednesday, March 23
Bird Pin Cushion
I am a big fan of the DIY Dish. They feature Janome machines all of the time. Earlier this week, they launched their 3rd season. They always kick off each season with a pin cushion tutorial and after watching, I could not resist making one of the little birds they featured by Joel Dewberry, a fabric designer who's promoting his new book== Sewn Spaces. (I think I am going to have to get that book) I am in the process of changing the color scheme in my sewing area and made the bird with a couple of scrap fabric pieces I had laying around. Here is the link to the tutorial. I think my bird turned out okay-- I obviously need a little practice with top stitching on the wings. I feel bad that in order to use this, I am going to have to stab it with pins- eek!
DIY Dish is having a contest to win a copy of Joel's book and some of his cool fabric, be sure to check out their website. Thanks for stopping by...
Monday, February 28
Girl Scout Cookie Bag

Last month I came across some Girl Scout fabric by Robert Kaufman Fabrics and just had to buy some to make Micaela "something". Micaela became a Girl Scout this past fall and when I bought the fabric cookie selling season was about to begin.
First, I added fusible fleece to the back of the fabric and machine quilted horizontal lines, I wish I could say they are straight but you can certainly 'see' that they are NOT....lol. I had to embroider it 'somewhere' and since embroidery wouldn't really show up on such a busy pattern I decided to applique a square then do an appliqued M and name on top. The square is from GGDesigns in Australia, the M is a font from Planet Applique and the font on the name is by AKDesigns.
I made the bag gussetted by adding a brown gingham coordinating fabric to allow enough space to carry 7-8 boxes standing up.
I lined the bag in the same green gingham from the applique square and added velcro for easy closing and opening.
I made the strap long and wide so it would be comfortable across the chest. I used the embroidery function on my new Janome machine to add a little personalization. Hopefully Micaela will stay in Girl Scouts for a long time and she can use this bag for delivering cookies many years to come. Thanks for stopping by!
After much thought (and deliberation), I decided to make her a bag so that when she went out to make "deliveries", she would be carrying the cookies in something cute. My first thought was a tablecloth for when the troop does sales in front of stores but at $10 a yard, I decided a bag would be much better use of the fabric.
So here is the bag... Ta Da!!!! I pretty much made it freehand without a pattern (don't recommend that).
First, I added fusible fleece to the back of the fabric and machine quilted horizontal lines, I wish I could say they are straight but you can certainly 'see' that they are NOT....lol. I had to embroider it 'somewhere' and since embroidery wouldn't really show up on such a busy pattern I decided to applique a square then do an appliqued M and name on top. The square is from GGDesigns in Australia, the M is a font from Planet Applique and the font on the name is by AKDesigns.
I made the bag gussetted by adding a brown gingham coordinating fabric to allow enough space to carry 7-8 boxes standing up.
I lined the bag in the same green gingham from the applique square and added velcro for easy closing and opening.
I made the strap long and wide so it would be comfortable across the chest. I used the embroidery function on my new Janome machine to add a little personalization. Hopefully Micaela will stay in Girl Scouts for a long time and she can use this bag for delivering cookies many years to come. Thanks for stopping by!Linking to Made by You Monday at Skip to My Lou
Monday, February 21
Soccer Bag
Sunday, February 13
Fresh Apple Cake
Fresh Apple Cake, ala Rose.
This recipe is from my Cousin Juanita, she has made this cake since I was a teenager, which is a very long time. I had not made it in years.
This recipe is from my Cousin Juanita, she has made this cake since I was a teenager, which is a very long time. I had not made it in years.Fresh Apple Cake
1.5 cups oil
2 eggs
2 eggs
1/2 tsp cloves
1 tsp nutmeg
2 tsp cinnamon
1 tsp salt
2 tsp baking soda
2 tsp vanilla
2 tsp vanilla
2 cups sugar!
3 cups flour
1 cup chopped pecans
5 peeled, chopped/sliced apples
1 cup raisins (optional-- I don't add these)
Highly recommend a KitchenAid for this recipe.
Cream oil and sugar. Add all dry ingredients including pecans. Mixture will be very dry. Add apples a few at a time. As mixer mixes apples, the juice will soften the batter to normal 'cake batter consistency. Pour in tube pan and bake at 300 degrees for 90 minutes or until knife inserted in center comes out clean. Happy Baking!
Saturday, February 12
The Gates NYC 2005
Six years ago today (Valentine's weekend), my husband and I took a Babymoon trip to New York City before our daughter was due to be born in May.
We were fortunate to be there the opening day of The Gates in Central Park, February 12, 2005. The Gates was a project by Christo and Jeanne-Claude. Christo & Jeanne-Claude have inspired the world with their art, which has been displayed in four continents and seen by millions. The built a reputation around the world for massive temporary art projects like wrapping Berlin's Reichstag and Paris' Pont Neuf in fabric.
The Gates were free-hanging, saffron-colored fabric panels that were suspended from gates throughout the footpaths of Central Park.


The Gates were 7500 gates, 16 feet high and lined 23 miles of footpathes in the park. It was an amazing site and I am so glad we were able to be there to experience it.

Thanks for stopping by.Friday, February 11
New Toy
Cupid made an early delivery for Valentine's Day. This is my new sewing machine, a Janome 5100.
A quick glimpse at my sewing area.... Nothing fancy, the desk is the desk I got for my fourteenth birthday (almost an antique, lol). The yellow doily was made by my maternal grandmother more than 50 years ago. The flower stick person holds my pins in the belly votive. On the shelf a few favorite trinkets, the flower pot is by one of my favorite artists Angie Strauss from Niagara on the Lake, Ontario, favorite Mary Engelbreit and Karla Dornacher books, a few pictures of me as a bridesmaid with two of my closest friends, Mary Beth and Kristi and the tiny one in the pink frame is of me as a baby with my Dad when I was about a year old. The pink Longaberger basket (breast cancer edition 2002) on my white shelf hold my scissors.
Thanks for stopping by...
Valentine's Day Towel
Found these Valentine's Day fingertip towels at Target. Bought a few to personalize for friends and cousins, little girls love these!
Monday, February 7
Owl Card
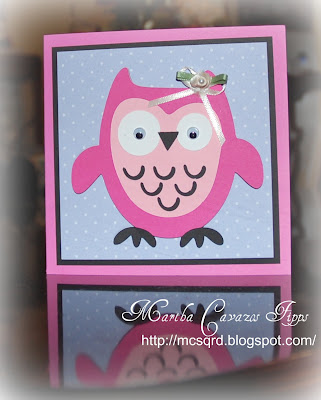
Your eyes are seeing right, a handmade card! Last week during the snow Micaela and I dusted off the Cricut and made a few cards. We made this one for one of her little friends that had surgery recently. The owl is from the Hoot 'n' Holler Lite Cricut cartridge, all the card stock is Stampin' Up! and the card is 5.5 inches square. 
Thanks for stopping by!

Thanks for stopping by!
B & B for Laila
Here's a set I made for a co-workers new baby girl. Her colors are dark pink, brown and green. I added a decorative scallop stitch to the burp cloth using my new Janome sewing machine.

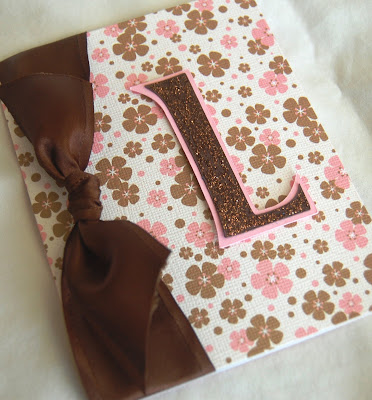
At the last minute, (3am) I whipped up a card to sorta match using prefolded card stock, satin ribbon and an L made with the Alphalicious cartridge on the Cricut. 

Thanks for stopping by!
Friday, January 28
Moving on to Hair Stuff...
Since there are only so many shirts, towels, bags and blankets I can make for our daughter, I have started to explore other 'embroidering' opportunities. I've been purchasing hair stitch designs from my favorite designer in Australia for a while, but had not taken the time to try them out. Well, I am hooked!
These are so fun, easy, and most of all FAST. The best thing is that I can make a bunch in one hoop. Here is my first attempt at a Valentine design.
There are many designs and you can attach them to fabric covered barrettes. The possibilities are truly endless.

Miss M loved it and now she wants one to match every outfit! Now, I have plenty to do! Thanks for stopping by.
These are so fun, easy, and most of all FAST. The best thing is that I can make a bunch in one hoop. Here is my first attempt at a Valentine design.
There are many designs and you can attach them to fabric covered barrettes. The possibilities are truly endless.

Miss M loved it and now she wants one to match every outfit! Now, I have plenty to do! Thanks for stopping by.
Subscribe to:
Posts (Atom)