Showing posts with label Stampin' Up cards and projects. Show all posts

Thursday, April 1

Happy Easter Banner

A paper project! Yes, your eyes are correct. My paper and supplies have been neglected ever since I got the embroidery machine but after the baby card last week I decided to make an Easter accordian banner.


I used the Alphalicious cartridge. This was hard to photograph because it's wide (nearly 4 feet) and the colors are pastels.Here's a close up so you can see the detail in the letters.

Supplies: Patterned Paper DCWV, Glossy White, Pretty in Pink, Almost Amethyst, Barely Blush, card stock from Stampin' Up!
Thanks for stopping by!

Tuesday, February 9

Teacher Valentine Favor

I am on the Teacher Appreciation committee at our daughter's school. We provide lunch for the staff meetings every other month. Since I work, it's really hard for me to contribute food because I would be dropping it off four hours before they eat. This month I volunteered to make a little favor.
These are Wilton tins from the bridal section of the craft store filled with Valentine M&M's. I purposely did not put Happy Valentine's Day on the labels so they could refill the tin with different candy and it wouldn't look "outdated" on their desks. The scallop and circle were both done with Stampin' Up! punches and I printed the white cardstock on the computer. These are super quick and easy!
Here they are on a heart tray. I literally took this picture with them on the hood of my car before walking in to deliver them! Thanks for stopping by...

Friday, December 18

Gift Card Holders

The Teacher Appreciation Committee at one of our daughter's schools specifically suggested gift cards for the teachers for Christmas gifts. All of the gift cards from the children were mounted on a wreath and given to the teacher on the last day of class. I loved the idea because it certainly made the shopping easier! But, I couldn't just hand over the gift card stuck on the card from the store so this is what I came up with...


I love that Winter Woodland font! Here is what the inside looked like...


I used the Sissix Gift Card Holder die to cut out the Garden Green (SU) base. I dressed up the holders with some ribbon and a simple heart shaped rhinestone.


To personalize it, I added a die cut of each teachers monogram using the font from the new Winter Woodland Cricut cartridge. (Real Red & White card stock).


The teachers really seemed to love them!

Friday, October 2

Pumpkin Treat Holder

My friend and sideline Mary Gardina made this adorable pumpkin treat holder. Isn't it adorable!

Wednesday, September 23

Mister Turkey

Here's a the swap I made for my upline's group meeting tonight.

Punches Used: Wide Oval, Scallopped Oval, Large Oval, Small Oval, 1" cirlce, Scallopped Circle.

Card stock colors: Chocolate Chip, Ruby Red, More Mustal, Pumpkin Pie.
Original idea was from Rebecca Williams, posted here. Thanks for stopping by....

Monday, September 21

Princess Stuff

So busy these days, finally I had a little time to craft...
.
Here are some goody bags I made for a friend who was hosting a Princess party for her daughter. The 'take out' boxes were purchased, I just made the tags and added the monogram letter for each of the girl's first names. Daughter helped by pressing the buttons on the electronic die cutting machine for the monogram letters & tag layers. She had the most fun cranking the handle on the Sissix for crown. As it turned out, these matched the place where the party was held perfectly! (honestly, that was unplanned).

This is the card we made for the birthday girl. The card base is Pink Passion by SU. The glittered and embossed card stock is from a stack. The FIVE was done with an electronic die cutting machine using the short stack and shadow feature.

This is the inside of the card opened flat-- lots of layers. Used Basic Black and White Glossy for the layers and then more Pink Passion & Basic Black for the design. I meant to take a picture before daughter wrote inside but we got in a hurry and I forgot. Side note, we are working with her on her penmanship, I think she writes pretty good for a four year old.


Thanks for stopping by....

Sunday, July 19

Happy Birthday Delaney!

This card was long over due! Delaney turned 1 back in April but we had not gotten together. Made this with the Cricut Alphalicious cartridge, it is 5.25 inches square. And, very similar to the cards I've been making for Micaela's friends that are turning 4. The butterfly embellishment is actually made of wood. Looking back at this, I probably should have made the top layer of the 1, cameo coral instead.
Here's the card open.
Thanks for stopping by......

Sunday, July 12

A lovely wedding

This weekend we drove to Shreveport to attend the wedding of my friend's daughter. It's hard to believe I have a friend (sorta my age) that has a daughter old enough to get married. My friend M'Lissa and I met in 1991 when I was still in college. We only lived in the same city for less than a year but have kept in touch and remained very close friends ever since then. Her daughter was 4 at the time, yesterday she was a beautiful bride. Time flies when your watching a beautiful young lady grow up.


Isn't she lovely....
Here is the card I made. I tried to match her colors and I think I got pretty close...

Hope your weekend was wonderful, thanks for stopping by....

Sunday, June 28

CASEing Tulips

This is one of the other cards from my June Stamp Club. This is almost a complete CASE of this card by Flowerbug's Inkspot. The only things I changed were stitched ribbon and the green background paper. This card seems so summery to me, my ladies really liked it. The tulips were done with the Wide Oval Punch and the 5 Petal Flower Punch, see the tutorial when you click on the Flowerbug's link.

Saturday, June 6

Just a quick post before we leave for the weekend. This is one of the cards we made at stamp club this week. I got the idea of using the reverse side of the embossed from from Patty Bennett's blog, when I read this post. I absolutely love this look.

I followed the instructions in Patty's tutorial....using the brayer, Regal Rose and So Saffron classic ink. The cut out roses are mounted on Barely Banana that has been scored every half inch. The leaves (from retired Roses in Winter set) are stamped in Mellow Moss. The card base is Mellow Moss.

Gotta finish packing, we're headed to San Antonio for the weekend.... Ya'll have a good one!

Friday, May 29

Teacher Thanks

Today was Micaela's last day at one of her schools. These are the gifts "we" (term used loosely) made for the teachers at the church preschool. The school colors are purple and gold and I had every intention of using only those colors but I couldn't make it work, so I used the 'purple' and added pink and green which are Micaela's favorite colors to match the printed grosgrain ribbon.

The box is a die cut, Sissix die Box #2 from SU and the flowers on the card are the Sissix die "Layered Flowers #3". The cards are 3x3 and I used the Swiss Dot Cuttlebug embossing folder to add texture.

We made 8 sets of these. The boxes are filled with a dozen Dove chocolates. She only has two teachers in her classroom but we wanted to give the directors and teachers from her neighboring class a little something too. The cards for her actual teachers were larger versions of the same card and the cards included gift cards to Kohl's.

I can't believe the school year is over! Making these little gifts was fun and next year I am going to try to do it more often. Next week is the last week at the Spanish school, I plan on making something similar for the teachers there.

Supplies: Lovely Lilac, Whisper White, Green Galore, and Pixie Pink card stocks. Printed ribbon from Dollar bin at Michael's.

Monday, May 18

10 Years of Love

My friend Kristi and her husband celebrated their 10th Wedding Anniversary May 15th. I was one of Kristi's bridesmaids and she was our Matron of Honor when we got married 5 years later. Here they are back in 1999, isn't that a gorgeous cake?

This is the card I made for them.

I started making a copper and white card because the 10th anniversary gift is supposed to be tin or metal. I struggled and struggled with that card and in the end scrapped it and chose "ever faithful- can't go wrong pastels" because I know Kristi loves soft colors.

Lots of layering and dimensionals here. I used the Storybook Cricut cartridge for the numbers. The DSP is Tea Party from Stampin' Up!. The So Saffron scallopped and simple DSP circle were done with Sissix dies on the Big Shot. The other layers were done with Accent & Elements Cricut Cartridge. The lime green layer was done with Sugared paper. The inside was layered too but I forgot to take a picture before I sealed the envelope. Hope you are having a wonderful day, thanks for stopping by.

Wednesday, May 13

Watercolor Roses

Finally, I am getting around to posting this. This is the Mother's Day card I made for my Mother. I love how this turned out. I used the watercolor technique featured on Patty Bennett's tutorial (HERE). When I saw this technique, I knew I had to try it. I actually had not gotten around to purchasing this stamp set, Fifth Avenue Floral, so I borrowed it and the required Shimmery White cardstock from my sideline Michele. Thanks Michele!

The stems are from the retired Roses in Winter set by SU and the Mother's Day sentiment is a stamp I picked up a long time ago that did not even have a label. Here's a close up of the rose.
My Mom absolutely loves Roses, growing up we always had 20+ rose bushes in our yard and always had a fresh bouquet sitting in a vase under the large Virgen de Guadalupe picture in our hallway.
Try the watercolor technique, you'll get addicted like me! Hope you've had a wonderful day.

Supplies: Shimmery White, Regal Rose, So Saffron and White Card Stock. White craft ink (for roses), Regal Rose craft ink (for Mother's Day) and Clear embossing powder. Leaves were stamped with Mellow Moss classic ink directly on Shimmery card stock. Brads are from Soft Subtles collection and sheer ribbon is from JoAnn.

Thursday, April 16

Working on Monkey Stuff

My friend's daughter is having a baby and I have volunteered to make the shower invitations and favors.

The Mom to be has selected the "Pop Monkey" collection from Babies R Us for the baby's room and wanted the shower invitations to have the same theme and the chocolate chip and celery colors.


The first stamp set that came to mind was the Monkey Business stamp set which is retired. I bought this set with grand plans but never got around to using it or event mounting it. Well, it sure came in handy for this....
Here's what I have come up with so far. I have to keep it simple because I have to make over 50 invitations in a short period of time and these days I do not have alot of spare time. We'll see which version the new Mommy picks.
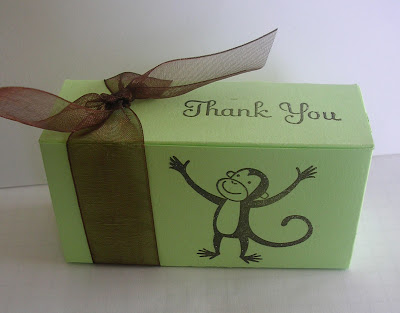
I have to say that normally I am not a fan of monkey, but the more I worked with this little guy the more I grew to love him. My favorite and easiest item is the favor box. I made it using the new Box #2 die from Sissix. This box is the easiest box ever, I could literally make boxes all day.

Thanks for stopping by.......

Monday, April 13

Tons of cards for Tricia

I just sent about 60 cards to my sister in law. She likes to buy my cards to have them on hand for the people she works with. I just sent her a package with this assortment. I sent 6 to 12 of each of these cards. I have to keep them simple in order to produce so many.
.
Girly Birthday using retired SU DSP, Groovy Guava & Purely Pomegranate card stock. I used a Sissix die for the flower and regular circle punches for the center.

This is from the same retired SU DSP.

Colorful "Way to Go". Paper is from DCWV Summer Stack


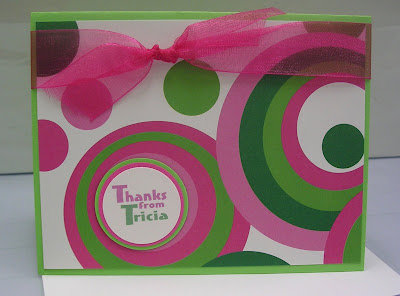
Thanks from Tricia in Pink Passion & Green circles. This paper is also from DCWV Summer Stack. Loved how the cirlces worked on this one. Sheer ribbon from JoAnn.


This one is straight in real life. Thanks from Tricia in chocolate chip. This is the cute & curly punch. Beige grosgrain ribbon from Michael's.

Manly Birthday. This is retired SU DSP. The Trips & Travel collection from 2007.
Thanks for stopping by.

Sunday, April 5

Another Easter Card

I hope you are having a nice weekend. We did some work around the yard yesterday and today we are resting. Last night I had some alone time in my stamp room and came up with another super simple Easter card.
.
For the card base I used a pre-made card (gasp!). I wasn't really planning on using these myself. I bought this box of cards by DCWV, for Micaela to embellish. They were $10 for 50 cards-- a bargain for a little girl that goes through cardstock like H2O. When I saw this pattern I thought of the Nestability card from yesterday. So, before I let her play with them, I decided I would make this one very simple easter card just like the one I did yesterday. All I did was add the stamped bunny & ribbon and the card was done.

Lately all I have time to do is these super simple cards, thanks for stopping by and Happy Palm Sunday!

Friday, April 3

First Easter Card of the Season

It's the week before Easter and this is my first Easter card of the season. I just love the sentiment "Some Bunny Loves You" because we say that to Micaela all of the time.

I used So Saffron for the card base. The striped glittery paper is from DCWV, Baby Girl Stack. Both stamps are from the Dollar Bin @ Michael's. I stamped the bunny image on glossy card stock with Basic Grey Classic Ink and colored the ears with a pink Sharpie marker. The glittery scallopped circle was cut with Nestabilities. The sentiment was stamped with Regal Rose Craft Ink and embossed with Clear Embossing Powder. IRL-- the pinks all match but somehow the flash made the pink colors look totally different in the picture. The ribbon is 1/4 inch Celery from SU.


Thanks for stopping by, have a great weekend.

Friday, March 20

Using up some retired DSP

I am trying to use up some retired Designer Series Paper so I made up some simple cards using one of my favorite stamps... the "My Dear Kind &Wonderful Friend" sentiment from the "All Holidays" stamp set by Stampin' Up!.
Nothing to these cards, just stamped the sentiment in coordinating craft ink and embossed with clear powder. Used the Scallop Circle & Plain Circle Nestabilities. The sheer ribbon is from JoAnn's.Thanks for stopping by.

Thursday, March 19

B is for Baby Boy

I've been trying to make up a little inventory of cards to have on hard. We know alot of families expecting babies so I thought I would make some baby cards.


I usually struggle with Boy cards but this one came together pretty quickly. The card base is Certainly Celery. The layered B was done using the Alphalicious cartridge on the Cricut and the layered rectangles were done using Nestabilities by Spellbinders. The designer paper is retired from SU, called Cutie Pie. The grosgrain ribbon is from Hobby Lobby. Inside the card I double matted cardstock using Bashful Blue and White and added a sentiment "B is for Baby Boy".

Hope you are having a Beautiful Day, thanks for stopping by....

Wednesday, March 18

Diaper Fold Treat


This is Becca Davidson's swap. She used Raspberry Tart DSP and the SAB Yummy stamp set. Isn't this adorable? Thanks Becca